Pages

Showing posts with label Easy Project. Show all posts

May 9, 2017

Hallway Doors

Slowly and surely the honey-colored oak is disappearing from our home.

WHOO HOO!!!

Our bedroom and hallway doors were in excellent shape despite being targets 
for nerf gun competitions and being in the line of fire for a mean game of sock war.
I couldn't see replacing them even though they are plain and boring.

First step was ripping down all the oak trim and replace it with the white molding
we did throughout the rest of the house and doorways.


With the molding complete and the weather getting nicer, I took the doors down and worked outside.

Oh how I love the sunshine!  <--- side note

Using a hand sander, I sanded down the doors with a medium grit paper.

After wiping all the dust away they were ready to paint.


Also in fantastic shape are the hinges.  I cleaned each set thoroughly.

I pushed the screws into a cardboard box and laid the hinges flat onto a
paper bag I had ripped open.


Using a spray paint for metals in an oil-rubbed bronze finish, I sprayed the hardware.

No more shiney brass!

<Insert jig of joy here>


But what color should I paint the doors?  

I adore the look of white molding and white doors; which I get to stare at every day in my front hallway.

(That project I discuss here and here.)

It looks so clean and crisp and open and light.

Adore!


Here is the dilemma I created for myself : I also love the color of my 
breakfast bar against my white cabinets and the dark wood floors.


So after much thought, I decided to break out of the box of conformity once again.


I went with what you do not normally see.

And I love it.


April 18, 2017

Toast & Heat Marks

The kitchen remodel has made our dining room table Grand Central.

We do everything here.
Prepping, cleaning, storing and cooking.
It's just part of the process.
Even if it is a little maddening at times.


The remodel has made us masters at creative dinners that produce very little dirty dishes.
Paper plates are my best friends!

Not really, but it sure is nice not having to wash plates.

One clever night, I made breakfast for dinner.
We love breakfast for dinner.

I took out the tabletop skillet, plugged it in to the wall and created magnificent french toast.
Soon a mile-high stack was on a paper plate on my dining room table.

Everyone had their fill.

It was amazing!

It was great!

It was easy!

Then I moved the paper plate that held the uneaten pieces of french toast.
I gasped and felt sick to my stomach.

There it was.
The biggest, uggliest heat stain.
In the shape of french toast.


Heart stopping isn't it?

After searching online for some hints, with shaking hands I tried the following.
AND IT WORKED.

Ready for this easy, peasy 3-step process?

1.  I took a white towel from my bathroom and laid it over the spot on the table.
 Maybe any color works, I don't know.
I just knew white wouldn't bleed through when I did step 3.

2.  I placed my clothes iron on the hottest steam setting it had.

3.  With the iron hovering closely over (not on) the towel, I hit the "burst" function on my iron.
I did this a couple times.

IT WAS GONE.
It doesn't make any sense does it?
Here is a picture of the exact same spot.


Hopefully you will never leave hot french toast on a paper plate on your dining room table.
Yet, if you do this trick will help erase the evidence and make it a distant memory.


March 7, 2014

Adding Cabinet Knobs

 I finally did it!
I took a drill to my kitchen cabinets.
The thought of making a mistake on something so visible paralyzed me from doing anything.
So there my cabinets sat; crying out for hardware but I was unable to give them what the needed.

Until winter hit and I found myself stuck in the house - all weekend - for the second weekend in a row.
ANYTHING can happen.  And it did.
My cabinets met Mr. Drill.

Taking our kitchen from boring oak to a more modern feel with white,
I opted for a simple brushed nickle knob.

What I used:
Drill
9/16" drill bit
Screwdriver
Pencil
My son's ruler from his backpack


A look at our cabinets before I started.


 Looking at the cabinets I decided the best spot for the knob would be 
2 mm in from the sides and from the bottom of the cabinet door. 

They make great handy - dandy templates that you can use that require no measuring.
Clever!
But I was stuck in the house in the middle of a winter storm and I didn't have one.
Bummer.

Using my son's ruler I marked 2 mm in from the side like this:

 Then I marked 2 mm from the bottom of the door like this:

I faced my fears and fired up that drill.
With the door closed I drilled through front the door.
Do not drill from the backside because you would then have to have the door open for this step.
Applying pressure to the door is much easier with door closed.

 Look at me using the drill!
Applause, applause, applause.
Ah, shucks - thank you!

 Using a screwdriver, I began screwing in the bolts into the backside of the cabinet door.
Continue screwing in the bolts until the bolt head is flush with the door.


The final step is twisting on the knob to the section of the bolt 
peaking out on the front of the cabinet door.


That's it!

Why was I so scared?
I have no idea.
Isn't that how it usually works though?

The improved cabinet door - ta da!


I love them!

Next on my list - finding the perfect drawer pulls.


May 27, 2013

Picture Perfect Old Window

The first house my husband and I bought when we were first married was 700 square feet of never-been-updated-1950's-pure-bliss.

I'm fibbing about the pure bliss part.
But it was our first house.

The little old man who owned it before us left lots of treasures in the garage, including storm windows for each of the windows on the house.

Shortly after moving in, we replaced all the windows leaving the storm windows in a forgotten corner.

When we moved 5 years later we left a lot of the original treasures and on a whim I told my husband to pack one of the storm windows into the moving van.  I thought I could put pretty papers in it and it would make a great picture.

A few short years later, old windows became in high demand on the brocante market.

I kick myself often for not taking more of those beauties.

We moved into our home in 1999, I put pretty papers in each window pane and hung that baby up.  
And never looked at it again.  ( <--- highly embarrassing)

As the remodel took shape this year and we stripped everything out of our home, I saw the old window for what it had become.

UGLY.

It's ok if you cringed.  I do too.

I decided if the hallway was to truly be a Gallery Hallway then why not add more pictures?

The best part?  It cost me a $1.48.

I looked through pictures of my boys and found some great personality shots.
I sent them to be printed to Office Max.
Office Max?? 
A little known fact:  Office Max will print your pictures 
on Engineering Paper (11x17) for pennies!!  
For this project it was perfect.  It is not on photo paper, 
so it best to use this service for a project like this or one that involves decoupage

Here is how I turned ugly into personality!

The tools you will need:
1.  Pictures printed on paper large enough to fit each frame.  
2.  A template the size of each window frame.
My frames are 11 1/2 x 10 3/4" and I used one of the papers previously hanging in the window.
3.  Painter's Tape
4.  Marker
5.  Paper Trimmer


Lay the template on the section of picture you want shown in each window frame.
With the marker, mark the photo at all four edges of the template.
Line the marks up with the blade of the paper trimmer and trim.
Important : If your window frame sizes are not square be sure your template is lined up on the paper the correct way.


Once all pictures are trimmed, arrange them how you want them placed in the window.
Be sure the tops of the pictures are placed at the top of your window frame.


Flip each picture over and using the painter's tape, tape each picture into place.


Here you see that one of my pictures was printed vertically making it a smidgen too short on the sides.  


No worries.

I taped the picture into place and grabbed some scraps that I had previously trimmed off.
I flipped the scraps over and used the white backsides to frame in the vertical picture.


With everything taped into place, I flipped it over
and hung it back on to the wall.

A reminder of where I started ....


...and what I have now!


It was such an easy and inexpensive project making it super easy
(and guilt free!) to change the pictures out often.

The entire project took less than an hour and cost less than 2 bucks.
My lattes cost more than that.

P.S.
I apologize for the glare on the window glass; 
no matter what angle I took the picture I just couldn't 
get rid of the closet door trim trying to take center stage of the picture.

Trim can be like that.

May 21, 2013

Bi-Fold Door Transformation


The hallway closet transformation is complete!

Here is the blank slate I started with.
Honey colored oak bi-fold doors are no more!


This is what we have now and I LOVE it!


I couldn't resist a fun and unexpected door handle.
Although we added a lot of satin nickel with our makeover,
I thought the oil rubbed bronze finish looks great with dark wood floors.


Updating the doors took a weekend of my time and cost less than $50.
If you want the step by step of how I did this transformation you can find that here.

The entry hall into our home is now bright and light 
and no longer feels like a dark tunnel.

Next time you are in the neighborhood, stop by and say hi.
When I open the door to greet you, 
this is the view you now see :

It is far from basic and it makes me smile to see
that fun and funky chandelier in our family room.

However, I think it's time to replace that light in the hallway.

"Oh Honey...." <---sung in a sweet and melodic voice.
(I'll let you know if the sweet tone works.) 


May 13, 2013

Bye Bye Blah Bi-Fold Doors

Our house was as builder-basic as they come. 
For a long time I lived with it, even though I didn't like it much. 
I always liked the look of trimmed-out doors, but not the price tags that came with it. 
Our bi-fold closet doors were blah and boring.  See?


With my son needing a project for his shop class, I knew exactly what we could do.  It was time to change out the big, blah, boring doors in our hallway.  I knew he had never done anything like this before and well, neither have I.  A perfect lesson for the both of us.

First I contacted my friend Harold at a local lumber yard.  
He let me ask him all kinds of really basic questions and I mean basic.  

I determined the look I wanted would require a 1/4" x 1 1/2" trim piece - the kind most commonly used in creating garden lattice.


Second, I drew the doors, took measurements and determined the layout of the doors.  
Now fully armed with the knowledge of the measurements, I handed my son a tape measure and had him do exactly the same thing.  

After all, this was his school project.


We determined we needed :
8 boards 6½' long
2 boards 4' long
3 boards 3' long
Light grade sand paper
Primer
Paint
Wood Glue


New Door Pulls - a girl has got to have her bling!


First, we sanded the doors.
Then with the doors still hanging, we measured (twice!), 
cut and then glued our pieces into place.

Our ever so professional blueprint.


After talking with our local hardware store,
we decided super-duper-don't-get-it-on-your-fingers glue was best.

Whoa Nelly, is that stuff powerful!


The glue worked great and even allowed for a 10 to 15 seconds of adjustment time.


Here is our first piece glued into place.


Each bi-fold is framed with trim pieces reaching from top to bottom.

When placing the outer most trim pieces it is imperative to leave
approximately a 1/4" gap.
This allows the doors to open and fold.

Without the tiny gap, you will not be able to open the doors as the trim will butt up against the door frame.


The good news - although the gaps may look glaring to you,
no one will notice them once the project is completed.


I promise.


Once all the vertical pieces were up the 

top and bottom pieces were glued into place,
followed with the middle piece.


Now that you have a top and a middle section on the first bi-fold,
simply divide each section in half to place the final two pieces.


With one bi-fold completely finished, the other three go by
quickly as you no longer have to measure each section
but simply line them up to each other.


Next is the priming and then the painting.
The glue adheres best when wood meets wood,
this is why the priming and painting are not done before.


Here is my work station.  It's a piece of cardboard.

It's awesome.


Next week I'll show you the the completed project.

I'm happy to report, m
y son's project got an "A"!


April 15, 2013

Breakfast Bar Re-Vamp


When deciding on the changes I wanted to incorporate into our home, 
I spent countless hours flipping through magazines and being inspired on Pinterest.

To narrow our taste to a certain style is nearly impossible ~ it is a modern-meets-contemporary-meets-shabby chic.

The dark floors and white cabinets brought in strong clean lines and I wanted to break that up with a pop of unexpected.  
I knew I did not want to use bead board on the breakfast bar as it had been done too often and is too expected.

What to do that is unexpected?  Batten & Board.   
Batten and board?  Batten & board! 
And do it in a completely different color.

Here is my blank canvas.


Armed with lots of questions, and not certain of all we needed, 
we visited a local lumberyard to try and put the ideas in my head into a reality.

The salesman that helped me was extremely professional yet the look in his eyes 
told me loud and clear he thought I was a tad on the crazy side.  
I solidified his thinking when I told him I needed the board and batten to be rough-sawn.
Still the professional, he showed me the perfect pieces.
As we left the store, he shook his head and stated,
"I have never sold board and batten for the inside of a home before.  I've been in the business a lot of years."
I promised to bring him before and after pictures.

Now for the fun part.
I removed the trim pieces and then went to work on removing the counter braces.
That was a lot of nails!

Although I wanted the rough-sawn look, I lightly sanded the board and batten.
This ensured a rough look with a smooth finish.

Next came the staining.
Walking the aisles of a big box store I stumbled upon the perfect color in their mis-tint section.
The absolute perfect color cost me $2.50.  
BARGAIN!
Bargains always make me happy.


This color is the most delicious brown-grey color.
It looks fantastic against the white cabinets and dark flooring.

First I cut and nailed the plywood to the face of the kitchen bar.
Next step was trimming the top, bottom, sides and corners with the 1x2 boards.
From there I needed to figure out how close I wanted the rest of the boards to be to each other.
Once I determined the distance, I used a scrap piece to "cheat" my measuring.
I simply laid the cheat piece against the outside of the first board and the second board would then be set at the outside of my cheat piece.

Hopefully this explains it a little more clearly than I can:


My Cheat Piece saved me a lot of time.
Nail a board down, lay down the Cheat Piece, nail the next board down.
Repeat.


The new counter brackets cost $10 a piece and although 
they are a different wood than the board and batten, 
held the stain and matched perfectly.


Once it was finished, it transformed the look of the kitchen.
The grey color in the stain continues the contemporary element 
all the while the board and batten brings in a hint of a farmhouse feel.

A touch of unexpected.
Which, in essence, is what life is all about isn't it?


Bringing in the board and batten was a simple project which did not cost a lot of money (less than $100!) and it took only a few hours of my time.

An easy, cheap and fun project ~ the best kind of project!

P.S.
As promised I returned to the local lumberyard to show the 

salesman my before and after pictures.  
The look one his face was priceless.
My guess is next time he won't be so leery of my ideas.
And we all know there will be a next time.


November 19, 2012

Our New Art Gallery

When I decided to make my husband's photography a more prominent feature in our home, I transformed our main hallway into an art gallery.

To bring a final touch to this space, I named our hallway.  After all, doesn't every gallery have a name?  I went out on a creative limb and named it....Fiorucci Gallery.  My creativity sometimes astounds me.

I found the letters at our local craft store.  It didn't matter that they weren't the same color as I knew I would be painting them black anyway.  
The letters weren't on sale, and I had to pay full retail for them (those who know me just did a collective "GASP!").  The cost came to $28.00.

I spray painted the letters, using matte black paint, which I had around the house.


Here are the tools needed to hang the letters.


Using the painter's tape, I marked where I wanted the letters to hang on the wall.


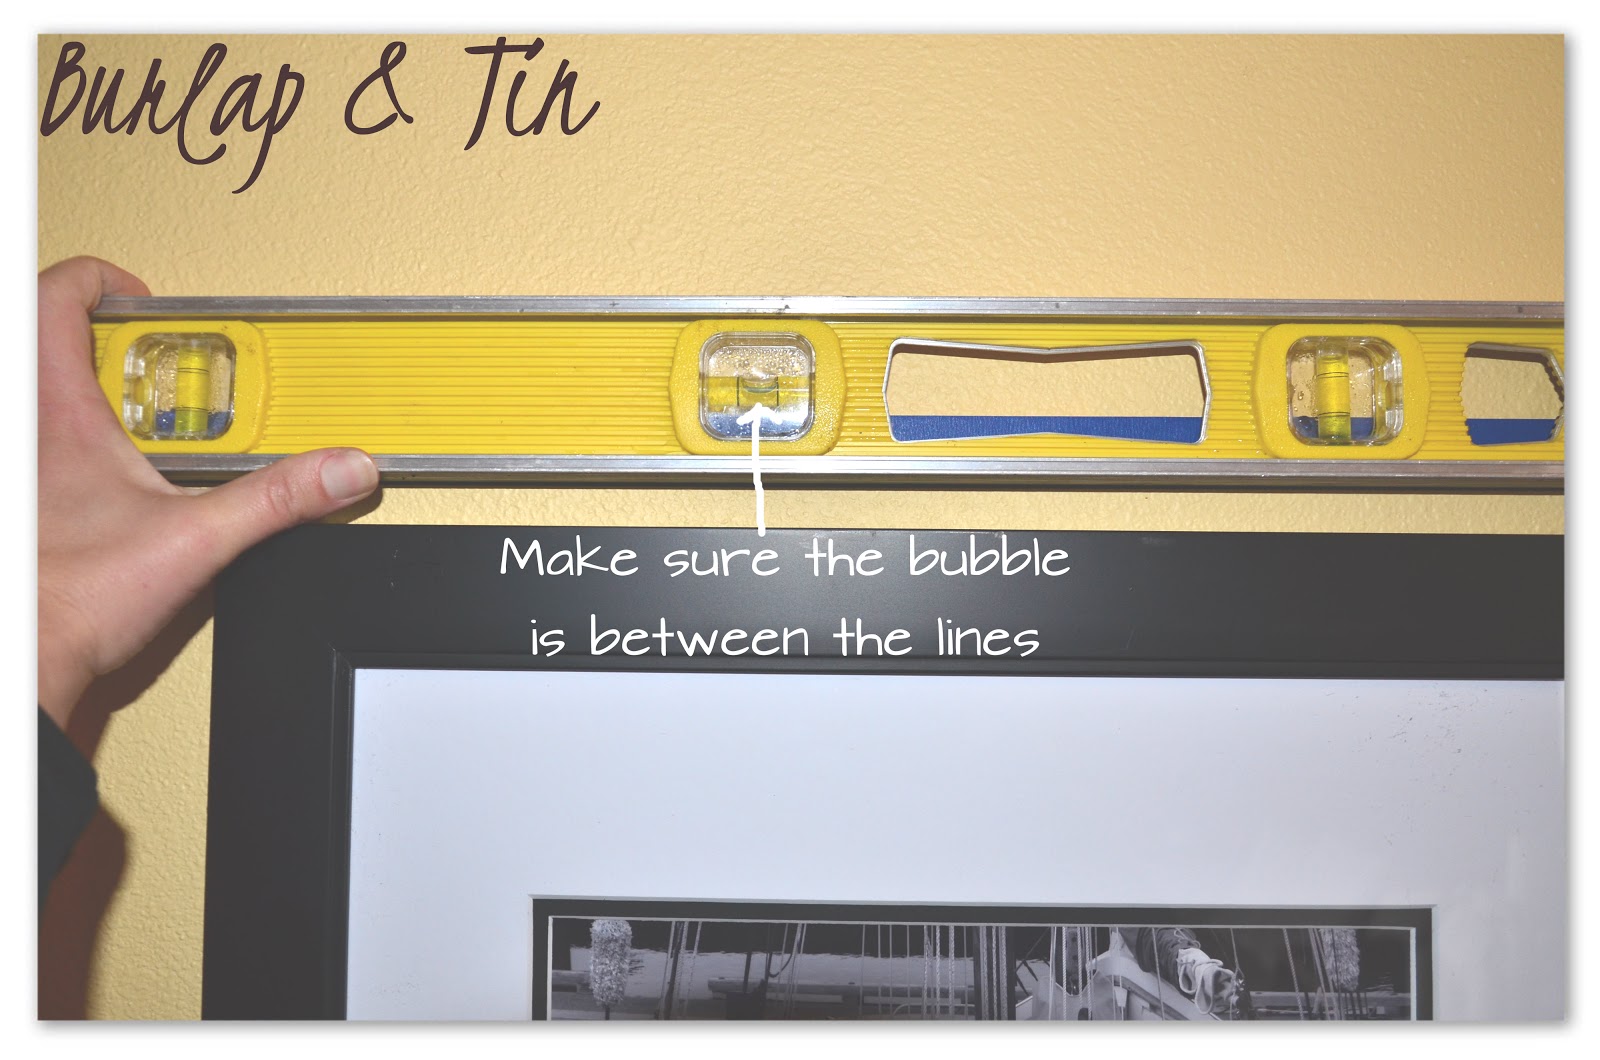
Using the level, I made sure the tape was perfectly straight.  The perfectly-straight-tape will be my guide to ensuring I will have perfectly-straight-letters. 


The letters did not come with a way to hang them on the wall.  Rather than use tape on the wall, I drilled a tiny hole in which the head of a brad nail (finishing nail) could fit.


Once the hole was drilled, I placed the head of the brad nail into the hole and pushed it in as far as it would go.


Starting at the far left, I hung the first letter.  I wanted the "F" and the "G" to be offset just a smidgen from the other letters.  The two larger letters required me to hang a nail and use a hammer.


Second, I placed the last letter to the farthest right.  By using brad nails on the back of the smaller letters, I only had to push them into the wall just as you would a tack.

I worked my way toward each end alternating between words to ensure the spacing would come out correctly.  The last letter to be hung is the letter "G".


TA DA!  The finished project!


A simple idea that gives this space a finished look.