Pages

January 28, 2013

Picking out Paint Colors

When my husband and I made the decision to spend the time, energy, and money to update our home little did we know how much time and energy it would take us.  The projects are taking up most of my time leaving me little time to keep everyone updated.  I wish I could, but I can't.

Sometimes I just can't find my Super Woman cape.

The walls and ceilings are painted.  The floors are down and as of last night I finished cutting and painting all the baseboards.  What a huge feeling of accomplishment that was!

When choosing the colors I kept the main color light to offset the rich dark of the floors.  The walls are painted this fabulous color called "Stone" from Maratha Stewart. 


What this swatch does not show you is how fantastically grey it is!  It is a very warm grey and looks incredible against the floors.

The trim I knew also had to be a warm hue.  We chose "Betsy's Linen" by Valspar.  This will also be the color I am going to paint our kitchen cabinets.


When chosing colors for your home, it is important to look at all the colors together.  I laid many, many paint chips on pieces of the flooring near different windows and doors to help me decide what looks best together.


These two colors look great together and balance each other well.  With the kitchen next on my project list I am going to be introducing a grey to the mix in hopes to bring an 'old and weathered' feel to a very modern edge our house has taken.

One of the many fun things that has come out of this remodel is the look of amazement on the face of our children.  Suddenly Mom and Dad have a cool side they've never seen before.

Wait until they see the chandelier we bought.


December 21, 2012

Inspiring Christmas Spaces

Our home projects are still in full swing and I promise to update everyone on the progress soon.   Since the house is in a bit of honey-do chaos, it is not the time for me to decorate for Christmas. 

In the meantime, I drool over the pretty pictures I see in the blogs I follow and I look forward to decorating next year!

Here are some fantastic, inspiring and fun Christmas ideas.


I love the colors of nature in this room.  The pine cone on display is a great touch of whimsy.


Lighted branches are always fun.

Classy and whimsy are perfectly combined in this wreath.

Evergreens dress up these lighted branches and create a very welcoming front porch.


You should have guessed I would add some burlap to these inspiring Christmas spaces!

Hopefully these spaces inspired you a little bit and now you are ready to go out and do.

Merry Christmas!

November 19, 2012

Our New Art Gallery

When I decided to make my husband's photography a more prominent feature in our home, I transformed our main hallway into an art gallery.

To bring a final touch to this space, I named our hallway.  After all, doesn't every gallery have a name?  I went out on a creative limb and named it....Fiorucci Gallery.  My creativity sometimes astounds me.

I found the letters at our local craft store.  It didn't matter that they weren't the same color as I knew I would be painting them black anyway.  
The letters weren't on sale, and I had to pay full retail for them (those who know me just did a collective "GASP!").  The cost came to $28.00.

I spray painted the letters, using matte black paint, which I had around the house.


Here are the tools needed to hang the letters.


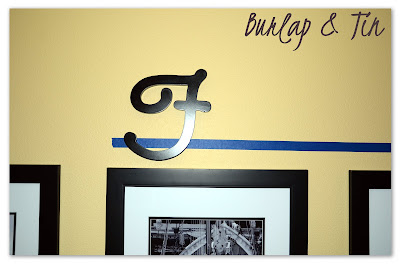
Using the painter's tape, I marked where I wanted the letters to hang on the wall.


Using the level, I made sure the tape was perfectly straight.  The perfectly-straight-tape will be my guide to ensuring I will have perfectly-straight-letters. 


The letters did not come with a way to hang them on the wall.  Rather than use tape on the wall, I drilled a tiny hole in which the head of a brad nail (finishing nail) could fit.


Once the hole was drilled, I placed the head of the brad nail into the hole and pushed it in as far as it would go.


Starting at the far left, I hung the first letter.  I wanted the "F" and the "G" to be offset just a smidgen from the other letters.  The two larger letters required me to hang a nail and use a hammer.


Second, I placed the last letter to the farthest right.  By using brad nails on the back of the smaller letters, I only had to push them into the wall just as you would a tack.

I worked my way toward each end alternating between words to ensure the spacing would come out correctly.  The last letter to be hung is the letter "G".


TA DA!  The finished project!


A simple idea that gives this space a finished look.