Pages

December 21, 2012

Inspiring Christmas Spaces

Our home projects are still in full swing and I promise to update everyone on the progress soon.   Since the house is in a bit of honey-do chaos, it is not the time for me to decorate for Christmas. 

In the meantime, I drool over the pretty pictures I see in the blogs I follow and I look forward to decorating next year!

Here are some fantastic, inspiring and fun Christmas ideas.


I love the colors of nature in this room.  The pine cone on display is a great touch of whimsy.


Lighted branches are always fun.

Classy and whimsy are perfectly combined in this wreath.

Evergreens dress up these lighted branches and create a very welcoming front porch.


You should have guessed I would add some burlap to these inspiring Christmas spaces!

Hopefully these spaces inspired you a little bit and now you are ready to go out and do.

Merry Christmas!

November 19, 2012

Our New Art Gallery

When I decided to make my husband's photography a more prominent feature in our home, I transformed our main hallway into an art gallery.

To bring a final touch to this space, I named our hallway.  After all, doesn't every gallery have a name?  I went out on a creative limb and named it....Fiorucci Gallery.  My creativity sometimes astounds me.

I found the letters at our local craft store.  It didn't matter that they weren't the same color as I knew I would be painting them black anyway.  
The letters weren't on sale, and I had to pay full retail for them (those who know me just did a collective "GASP!").  The cost came to $28.00.

I spray painted the letters, using matte black paint, which I had around the house.


Here are the tools needed to hang the letters.


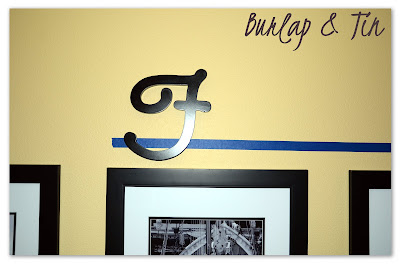
Using the painter's tape, I marked where I wanted the letters to hang on the wall.


Using the level, I made sure the tape was perfectly straight.  The perfectly-straight-tape will be my guide to ensuring I will have perfectly-straight-letters. 


The letters did not come with a way to hang them on the wall.  Rather than use tape on the wall, I drilled a tiny hole in which the head of a brad nail (finishing nail) could fit.


Once the hole was drilled, I placed the head of the brad nail into the hole and pushed it in as far as it would go.


Starting at the far left, I hung the first letter.  I wanted the "F" and the "G" to be offset just a smidgen from the other letters.  The two larger letters required me to hang a nail and use a hammer.


Second, I placed the last letter to the farthest right.  By using brad nails on the back of the smaller letters, I only had to push them into the wall just as you would a tack.

I worked my way toward each end alternating between words to ensure the spacing would come out correctly.  The last letter to be hung is the letter "G".


TA DA!  The finished project!


A simple idea that gives this space a finished look.


November 9, 2012

Inspiring Spaces

It's time for some weekend inspiration!

Below are just a few of my favorite spaces I stumbled upon this week.


I love the simplicity of the black and white. 
The faux fur on the chair brings a comfy element against the starkness of the white.


This is a perfect example of combining two spaces. 
The yellow on the wall is echoed in the next room with the yellow chair. 
The cubed space on the far wall is repeated in how the pictures are hung on the yellow wall. 


Not only do I love the color of the cushions, I love how it ties in perfectly with the trim of the house.  Gorgeous!


The kitchen island looks like a piece of furniture rather than cabinetry.  
This brings an element of uniqueness to this space and is further accentuated with painting it a color completely unexpected.


Hopefully you are inspired by this week's finds and get a creative bug to do something in your home this weekend. 

Now, go and do!