Pages

October 30, 2012

Our Flooring Adventure Begins!

We purchased our home new from a local contractor in 1999.  Nothing needed to be done as everything was brand new, never been used and sparkly fresh.  Then one day, with hot water leaking everywhere from the hot water tank, we realized the house is no longer brand new.

And then I looked down.  At the carpets.  Oh boy.  No amount of deep cleaner could save them.  A house full of boys had become very evident on the carpet. 

Warning : looking down at your flooring, I mean really looking at the flooring, may cause you to want to rip it out and replace it.  Which may in turn cause you to buy your spouse's favorite drink, offer them a couple glasses with their favorite dinner before bringing up the subject of replacing the floor.  Be sure to include the favorite drink as part of your budget numbers.  Warning over.

After searching online and price shopping at several stores around town, I found THE one.


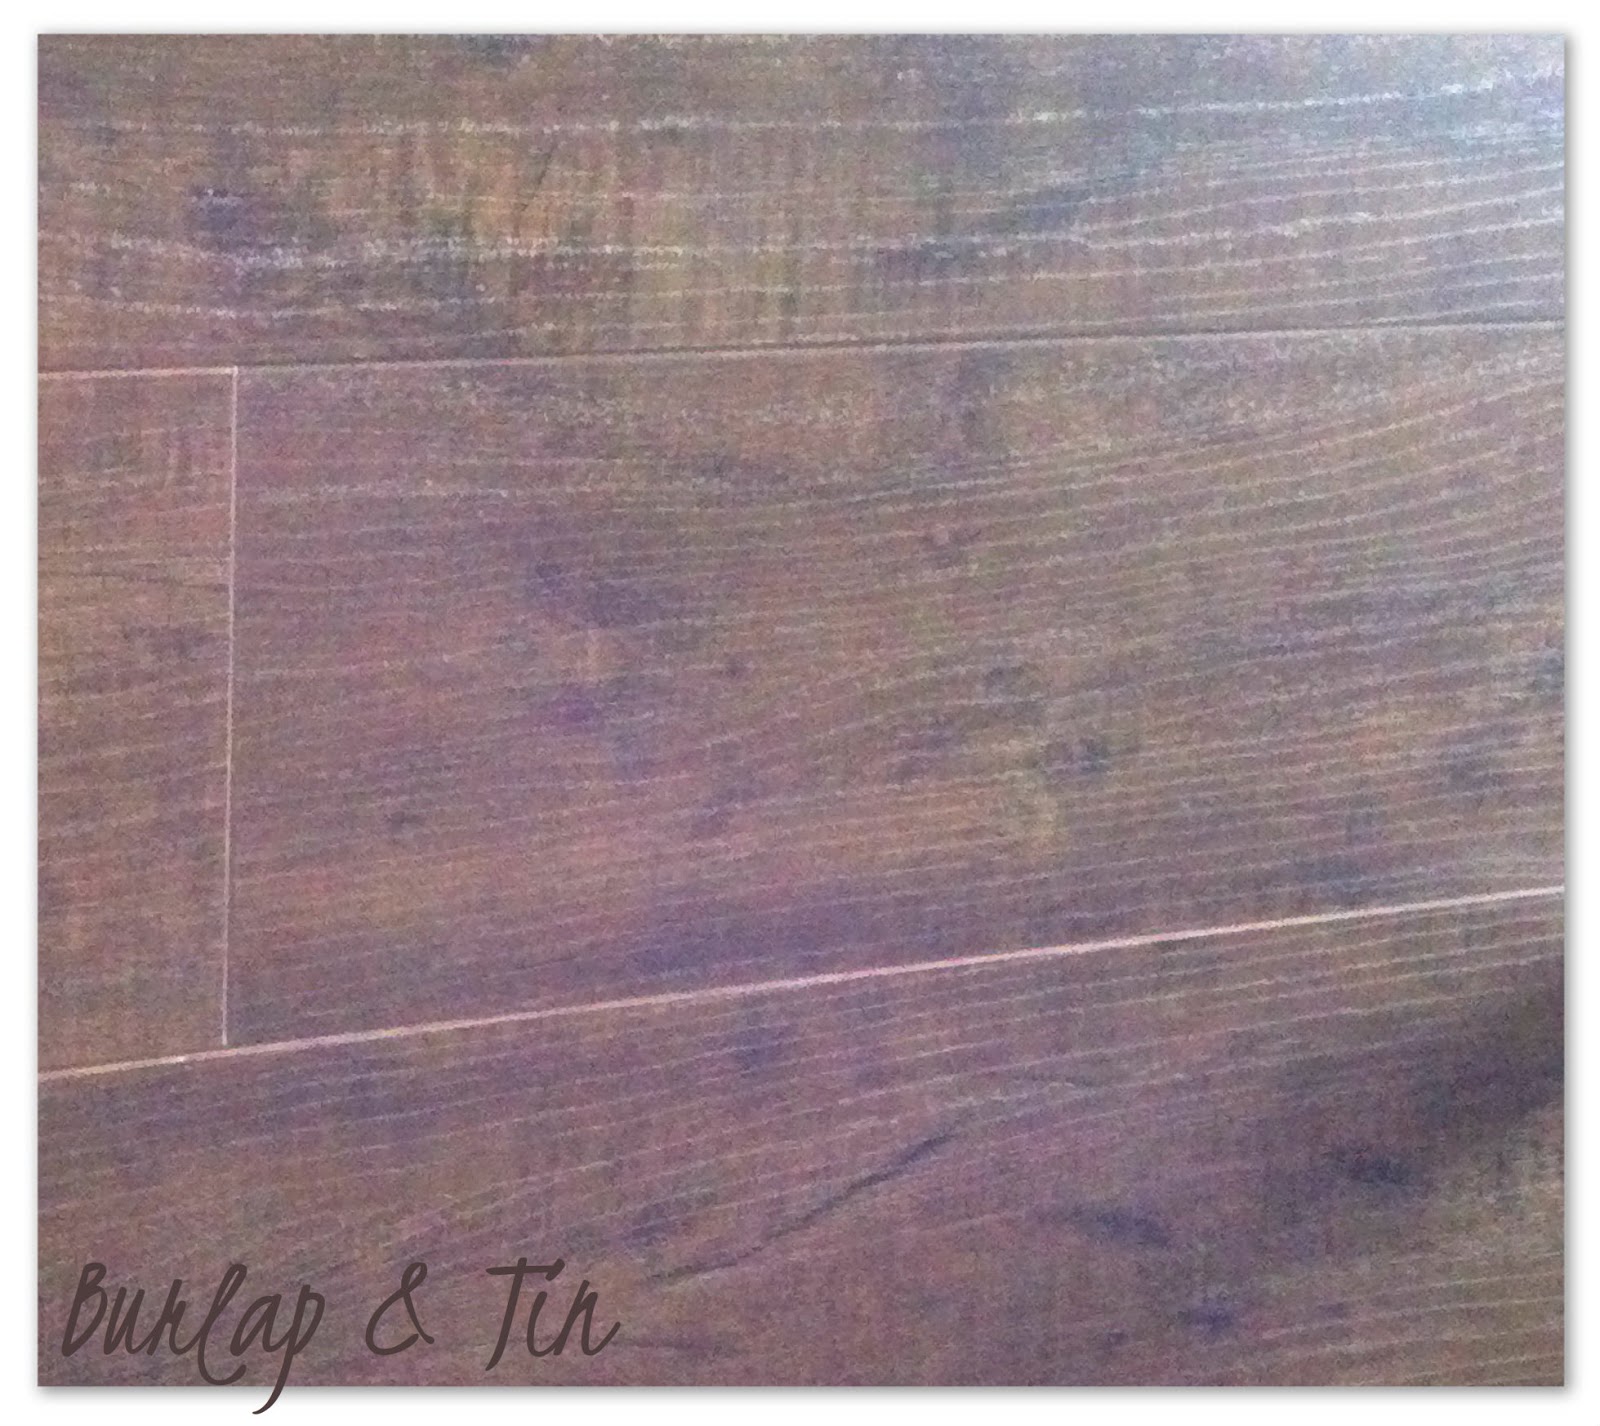
The wood grain reminds me of old barn planks which I absolutely adore.

We chose a glueless laminate flooring system 12.3 mm thick - the thicker the flooring the greater reduction in noise.  As much as we would have loved to put in real hardwood, the truth of it is this : we have boys who love being boys.  I do not want to have to worry about my boys damaging hardwood floors.  I want them to be kids too.

The other point we considered was : me.  I like to try things and then after so many years, I like to try new things.  I love the look of this floor and in 10 years if I decide I want to try something different, I won't feel bad doing so. 

It's always good for a girl to leave her options open.  (My husband is shaking his head).

The demolition begins in a few weeks and the goal will be to have it completed in time for the Christmas tree to go up on the 1st of December.  Wait, I'm running a marathon that weekend; we will have until December 4 to finish the floors. 

I just gave my husband 3 more days, isn't he lucky?!?

October 26, 2012

Inspiring Spaces


Every Friday  I hope to bring you some of my favorite inspiring pieces I've come across during the week.  I say "hope to" as I'm a busy mom and may not always have the time.  Super Mom - yes, Super Mom with a lot of spare time, no.

Here are some of my favorites I stumbled across this week.  I hope they inspire you to do at least one change in your home this weekend.


I love the big, white, fluffy comforter on this bed.  It invites me to curl up into it.


 I love, love, LOVE these floors.  A perfect combination of old and new is showcased with the wood floors and crisp white of the room.  Great design includes attention to little details.  The molding on the backside of each step in the staircase proves no detail is too small.


Here the octagon shape in the bookcase is carried through into the floor design. 
I love the boldness of the color as it defines a tiny corner that could otherwise be overlooked.


Those tiles ROCK.


Thank you for taking the time to enjoy what has inspired me this week.  A good rule to remember - even though something may not be your style you can always pull something from it that you do like; whether it be color, shape or the way something is laid out.

Take what inspires and go DO.

Enjoy your weekend!


October 18, 2012

A Monogram

Not that long ago I found myself with a little bit of free time.  Rather than do something completely productive - like going to the grocery store so my family could eat - I decided to spend some time walking around the craft store.  I hung the Bad Mom of the Year Award next to my marathon medals on  my wall.

Walking around the store, I could not remember the last time I had been there.  I felt as if I had walked into a gold mine of creative ideas.  As any woman on a budget, I checked out the markdown section and was happy to stumble upon a big letter "F".  It was big and heavy and black and I loved it.  As there were only two letters there - both the letter "F" (our last initial) - I just had to have it. (My husband is looking at me blankly right now.  Blinking.)

I had no idea what I was going to do with them, but that was beside the point.  Wasn't it?  Maybe?  (Husband's blank look again).

Imagine my shock when the checker rang it up and it was only ONE PENNY!!  I bought both.  I'm such a big spender.

Once home, I found an ugly picture frame I had purchased years ago for a dollar.  I removed the glass and backing.  I then spray painted the frame matte black.  Once the paint dried, I looked around my house to find a spot that needed a monogram.  The perfect spot was found above the walkway leading from our kitchen into the dining room.


A small project, that cost me a little more than a buck, gave me pizzazz in an often forgotten space.


What do you think?  I love it!


October 11, 2012

My New Front Porch

Working in the front yard one day, I was looking at my front porch and the only thought I could think of was BORING.


I saw you yawn.  It's ok.  It made me yawn too.


Then my son ran by me while playing tag with the neighborhood kids.  He was wearing a bright neon green shirt and it got my creative juices flowing.  I drove to the local hardware store and after staring at the many, many colors of spray paint I decided on two really fun colors ~ Green Apple and Orange.

Next stop was the fabric store.  I purchased two foam pads for $10 each bought 2 yards of outdoor fabric which was on clearance.  Oh how I love clearance!  The fabric came to $8. 

Last but not least, I had my eye on a big paper mache letter "F".  With only one left, I grabbed it as I knew I would kick myself later if I didn't.  Even the $10 price tag on the letter didn't deter me - I knew it would work perfectly for what I wanted to do.

Once I was home I got to work.  The longest part of the process was taping off the furniture for the spray painting.  After the painting, I tackled the pillows and then the monogram.

Without further ado, here is what I created in a single weekend.  No more boring front porch!


LOVE how the color pops bringing cheerfulness to our entry!


Many things I found laying around the house and repurposed them.  The great thing about paint is you can always change it.  It's that easy!
 Shortly after I finished, my neighbors wandered over and told me how much they love looking at my front porch and it brings a smile to their faces.  And that brought a smile to mine.


October 10, 2012

How To Have a Gallery Hallway

My husband takes fantastic pictures and I am always looking for a way to showcase them in our home.  I decided to turn our hallway into his very own art gallery.

This could pose only one problem ~ the pictures would have to be perfectly aligned or it would drive me crazy.  (Ok, I may have design OCD tendancies).  Here is the step by step and EASY process of how I got all 5 pictures to be perfectly aligned. 


The blank canvas I began with.

The tools you will need for this project :


Start by setting the picture frames apart roughly the distance you will want to hang them on the wall.  Once they are spaced the way you would like them, measure the distance between the hangers on two of the pictures.


Using painter's tape, rip off a section the distance measured between pictures. 

For my pictures I rounded up to an even 24 inches.


Grab two of your handy-dandy picture hangers.  I hold them in my mouth.  You might not want to do that.


As I am hanging 5 pictures I am starting with the middle picture.  To find the exact middle of the wall, I measured the wall space I am using and divided by two. 

The area I am working with is 14 feet ~   divide that by two, and I knew I wanted my middle picture to be placed at the 7 foot mark.

Here I placed the edge of the painter's tape at the 7 foot mark and worked my way to the right.


Check to make sure the painter's tape is level on the wall.  The great thing about painter's tape is you can easily adjust it if you need to.


Place a picture hanger in the same spot on each end of the tape. 

To keep it simple, I used the upper corner each time.  I am not an expert picture taker (thus the big shadow in the middle of the picture) but you can see where I placed my hangers at the same spot on each end of the tape.


Repeat the process by simply moving the tape over using one of the hangers you just hung as your starting point.

You can see the blue tape between picture 2 and 3.

Continue on until all your pictures are hung.


Just look at how straight those pictures are!


Ta Da!  The completed project.  Well, almost complete as I have yet another idea brewing.


October 1, 2012

Bathroom Remodel : It's finished!

It took a little while, ALOT of elbow grease but it's finished!  The bathroom remodel is complete! 

Remember what we started with ?


This is how it looks now!


I love how the tile floors turned out.


This faucet is the inspiration that started the entire remodeling process.  Have I mentioned before that I LOVE MY FAUCET?


What is your favorite room in the house? 

Bathroom Remodel : Laying Tile

Laying tile floor was something I had never done before and I was amazed at how relatively easy it was to do!  A majority of the work was done in a single weekend.


First step was removing the linoleum and bringing the floor down to the subflooring.


We also removed all the trim, including the trim around the doors


After exposing the subflooring, we laid down cement board.  This is a vital step in laying down tile in a wet environment.

<-- Here my husband is nailing the cement board down to the subflooring.


I began laying the tile in the center of the room.  This gave me an idea on how the tiles would lay out.


I simply continued the pattern.  Once all the tiles were laid out, I had to cut some tiles to fit.  This requires a wet saw.


This is the wet saw in action.  OOOOOOO - power tools!


With the tiles cut and laid out, I labeled each and every one so once I removed them to lay down the tile cement I would know exactly where each one went.  I also color coded the labels by row.

I suppose I can be a tad organized.


The 2x4 scrap wood was used to ensure the tiles were level.  Once I laid a row down in the cement I gently tapped the wood with a rubber mallet to ensure each tile laid down evenly. 

Nothing could ruin the room quicker than having the tile uneven and spending the next umpteen years tripping over a corner that didn't lay flat.  Imagine all the ruined pedicures!  Tragedy I tell you!


After drying time, next on the agenda is spreading mortar inbetween the tile.  Mortar can come in many, many, MANY different colors.  Choose the right color to enhance what you are doing in the room.  I chose one that blended well with the tile.


Once the mortar has dried, it is time to rinse the floors.  Don't panic!  It's suppose to look like this.

Rinse, repeat.  Rinse, repeat.  Rinse, repeat.  It's every shampoo-er's nightmare.

The tile will eventually become clear after several rinse and repeats.

The final step is sealing the floor.


As complicated as it may look, it truly was a lot simpler than I anticipated.  You can do this!

Next on the remodel : Installing everything important to a bathroom.


Bathroom Remodel: Before

When my husband and I bought our home, we decided one of the first things we wanted to upgrade was the main bathroom.  The room was basic and boring; nothing in this room spoke of our style. 

My mind started spinning ideas and the research began.  Quite often I can see the finished project in my mind and my challenge is to convey them to my husband.  He's gotten very good at not panicking and trusting my vision.  Yet, this was different.  This was going to be far bigger than just a coat of paint, this was going to be changing out everything and doing it ourselves.

Yikes.  Even I was a tad bit anxious over this as we had never done anything of this magnitude before.  I am also stubborn.  I knew we could do this.

This is the plan we laid out:
1.  Demoliton
We sold the cabinet, sink and faucet.  It was in great shape and I could no way throw it out.  We yanked out the linoleum flooring and stripped it down to the subflooring.  We also removed all the trim.

2.  New Flooring
With some great advice from friends, I tackled laying down tile floors.

3.  Install Cabinetry
We found exactly what we wanted as the sink cabinet at the hardware store.  However, I could not find a tall linen cabinet that I liked anywhere, so I made one.  My dad helped.  He's awesome.

4.  Install Countertop and Sink
The countertop was the most expensive piece we purchased and it was worth it.  Both the countertop and sink came from the hardware store.  Who would have known you could buy so much from a hardware store? 

5.  Install the Faucet
The entire room was designed around this faucet.  I LOVE MY FAUCET.

6.  Install Lighting and the Mirror
It took us awhile to find the right lights for the room but I am glad we waited until we found what we wanted.

This is what we started with...


When we took the lights down, 1980 showed up and snatched them back.

Next : the demolition begins and the tile goes down.